I'd always wanted an arcade game. So I bought one, under the assumption that taking it apart and fiddling it would help supplement my ongoing electrical engineering education. Here are some words and pictures relating my experiences in this endeavor.
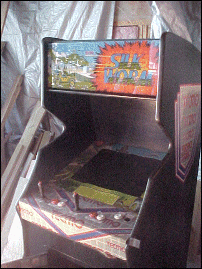 | First I found a machine on eBay. This can be accomplished by narrowing your search to only items that are being sold in the same general area as that in which you reside, as you don't want to have to pay to ship one of these things. Once you've found a machine, you can then begin losing auctions. I lost about three different machines in the last 5 minutes of the auction before I finally won this one (For cheaper than I had bid on the other three, even!). So yeah, this is the Silkworm machine as I first recieved it. The game works fine (Except for one level where the background is all messed up). The cabinet is set up next to the old fridge we have in our garage, which labors endlessly to chill our beverages. I always intended to convert it over to something else, and its location has prompted me to try and find something two-player and ridiculously competitive, so everyday trips to grab a coke end in fistfights. Or something.
At any rate here's a link to a page containing more information than anyone should ever need on Silkworm. |
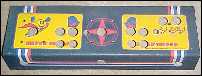
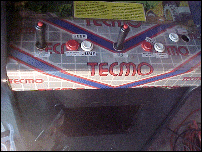 | Here's how the control panel was set up for Silkworm: Two players, two buttons each, and two start buttons in the upper right hand corner. You'll note that these start buttons are in the least convenient place possible (When playing a two player game, player one has to reach across player two to hit start). |
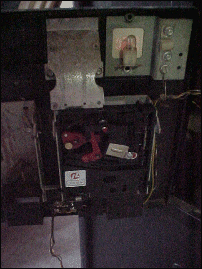
 | This is the underside of the control panel. You'll note that the panel itself is metal, which kind of sucked because I planned on adding buttons beyond the two it came with for each player. The hardest part of this whole process was getting the control panel off. It was attached with all these hinge-ish clamp thingys, and there really wasn't any good way to see what you were doing. I ended up having to stick my head through the coin door with a pen light in my mouth to figure out that I had to undo three of those things AND a wingnut to get the damn panel loose. |
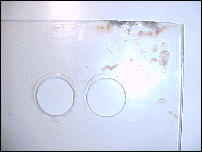 | This is the plexi cover for the control panel. It went straight in the trash because it seems that prior to my recieving it, people had grown quite fond of setting lit cigarettes on it. |
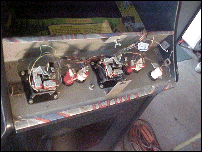
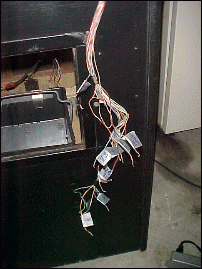 | After playing Silkworm enough to get sick of it, I decided to start tearing everything apart. I un-soldered all the controls from their wires, being careful to label the wires as I removed them. What you see at left is the mess of wires I was left with. |
 | I took out the Silkworm monitor graphics (Tanks and helicopters and such), and cut my own plain black border from a piece of posterboard. This was in case I got a game that involved something non-tanks-and-helicopters-centric, such as dismemberment or perhaps racing. |
 | I also put in a switch to toggle the sound on and off, because we all know how grating video game music can become. See that bluish color? Aside from the outside panels, most of the wood is painted that color. Why? I couldn't tell ya, but I was too anxious to mess around with the other aspects of the cabinet to do too much about it. Maybe later. |
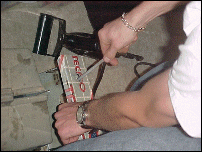 | Next my friend Ryan and I attempted to put a few more button holes in the control panel. This proved to be quite an ordeal, so much so in fact that I ended up abandoning any hope of using the original panel. This is a picture of Ryan filing down a hole he drilled. This picture is interesting because Ryan was awake when this picture was taken (He is narcoleptic). Shortly after this picture was taken, it was my turn with the drill, and he (honest to god) fell asleep on the floor of my garage. |
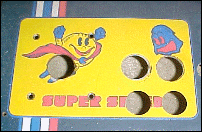
 | After giving up on updating the original panel, we peeled the 'Tecmo' contact paper off and found that the cabinet originally housed a Super Pacman machine. The previous owner had drilled a few extra holes and covered the control panel to convert the machine to Silkworm. This explains why the start buttons were in such an awkward place - the original Super Pacman didn't support two player simultaneous play - in fact it only had one joystick, therefore reaching across a second player to hit start wouldn't have been a concern. Oh wait, that explains why the cabinet was originally blue as well (Super Pacman used a red, white, blue, and yellow color scheme). |
 | This is a flying Pacman vs. ghost picture. |
 | This is a ghost vs. three little Pacmen picture. |
 | The mechanisms that accept quarters were broken when I recieved the cabinet, so the only way to add credits was to open the coin door and flick the little coin switch that the quarter would hit if the mechanisms were working. I wired up an extra button as a credit adder, because it was really annoying to be playing me some Silkworm and run out of credits and have to open the coin door and flick the switch a few times. |
 | I wanted to be able to accept quarters eventually because I'm obsessive compulsive like that, so I ordered a coin mechanism (just one at first, in case I lacked the finesse to properly install it) and put it in. It required some physical alteration of the coin slot, but it now works properly. I also added a lock for the coin door, so I can swindle my friends out of their chan - I MEAN for authenticity. Yes, for authenticity. |
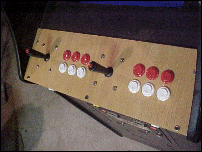
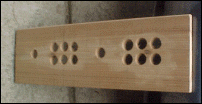 | Around this time I had won a cheap circuit board for a random Japanese Puzzle game on eBay, and I was sick of not being able to test it out, so I set out to make a "temporary" control panel. At left is the top of said panel. I made it out of wood. |
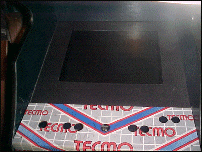
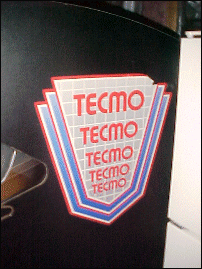 | Something that was also bugging me were the freakin' huge Tecmo decals that were on the sides. They were already chipped and peeling. So I ripped 'em off. |
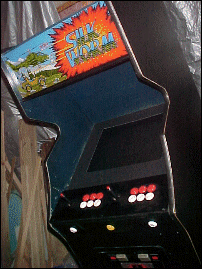 | Here's the cabinet as it is now. I put in six buttons for each player in case I ever put in a game that requires that many. I also relocated the start buttons to the front right and left of the panel, and installed the yellow button in the center to add coins. I still need to get a blank marquee thing. |
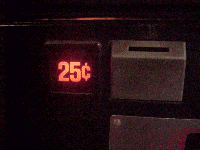 | While I was waiting for the extra coin mechanism and lock to come, I needed something to do late at night when I should be sleeping, so I ran wires from the 12 volt terminal of the power supply up to the little light bulbs behind the 25C thingys (How the hell do you make a "cents" sign? This keyboard does not have one, confound it.) Now they light up. Imagine that. |
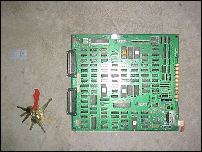 | In case you were wondering what the circuit board to an arcade game looks like (which is highly doubtful), here's a picture. Those are my actual car keys to the left of the board, provided for scale. |
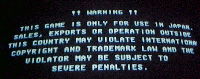 | Remember that random japanese puzzle game I mentioned? Here's the screen it shows when you first power it up. Apparently I'm violating international copyright laws. Fun. |
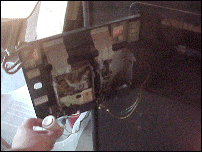
 | I forgot to say that it looks like one of the previous owners misplaced his keys to the back of the cabinet, because the lock was popped off. I did my best to glue the wood back together and added a new lock. And made copies of the key, of course. |
 |
Around this time I decided my temporary control panel had just about worn out its temporariness. So I made a new one. Hooray. |
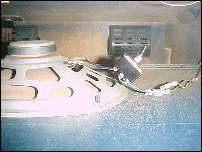
 | There is a switch that wasn't used much on older games, but is used on newer games called a test switch. Silkworm didn't have one, so I decided that I needed to add one in an easily accessible place. I decided to take out one of the vents on the back of the cabinet... |
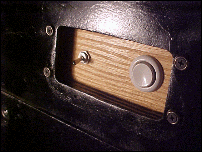 | ...and add a little panel with the test switch and the relocated sound on / off switch. Convenient! |
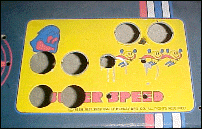
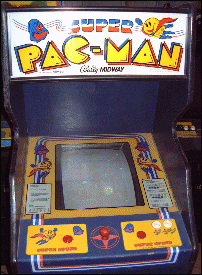 | I did a little bit of research into this whole Super Pac Man thing, and it turns out whoever converted this cabinet into a Silkworm needs to be shot. Here's what an all-original cabinet would look like. Note the original button configuration and all that jazz. This, however, is not the reason the silkworm-coverting-person should be shot. That reason can be found in the next picture down. |
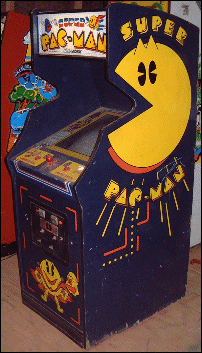 | Here is the side and front art to the Super Pac Man cabinet. That notch in the side was designed around Pac Man's mouth for god sake! What would possess someone to cover that up? The front art on my cabinet was painted over with black spraypaint, but you can still see the areas where the Pac-Graphics were. |
 | The sideart was completely covered by what looks like restarant grade black linoleum or something. See the out-of-focus blue wood protruding from beneath it? That's where all the Pac Man art work is. Under there. |